 Pin It
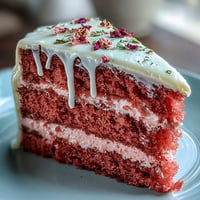
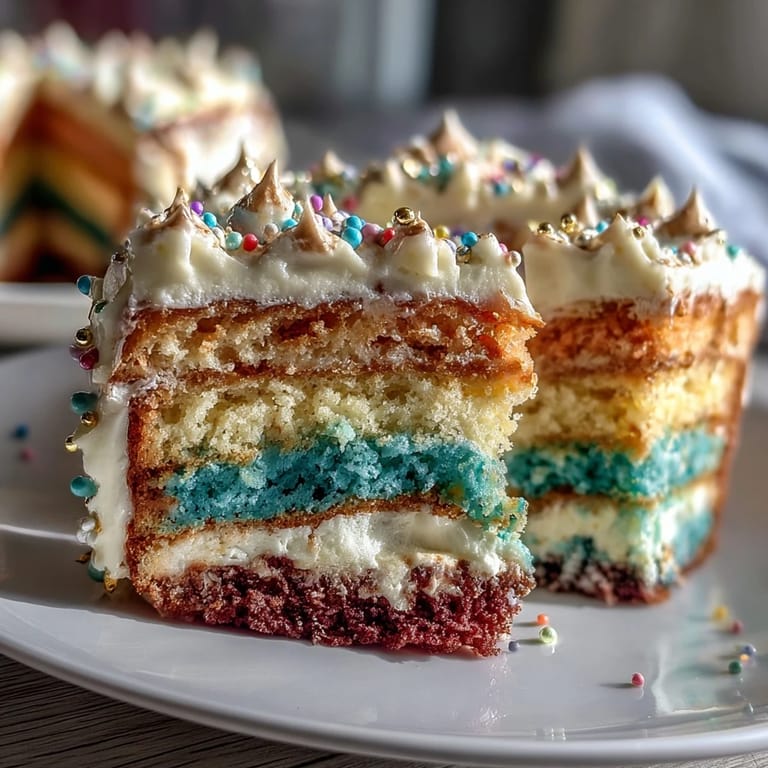
 My cousin texted me three weeks before her graduation asking if I could bake her a cake—nothing fancy, she said, just something that felt like her. When I asked what colors mattered, she rattled off her school colors with this quiet pride that made me understand this wasn't just dessert. It was a moment. So I decided on an ombre layer cake, each shade getting lighter as it climbed toward the top, like she was rising toward something bigger. That first time I made it, I realized how a cake could actually hold meaning, how the colors themselves could tell a story.
I'll never forget my hands shaking slightly as I was stacking the layers in my cousin's kitchen the morning of her graduation party. Her little brother kept sneaking tastes of buttercream from the bowl, and instead of stopping him, we just laughed. When she walked in and saw the cake sitting on her table, with those perfect gradient colors catching the afternoon light, she got quiet for a moment. Then she hugged me, still in her cap and gown. That cake became the backdrop for every single photo from that day.
Ingredients
- All-purpose flour (3 1/4 cups): This is your foundation—measure it by spooning into the cup and leveling off, not scooping directly from the bag, or you'll end up with a dense, disappointed cake.
- Baking powder (2 1/2 tsp): This gives your layers their tender crumb and helps them rise evenly across all four pans; don't skip it or substitute with baking soda.
- Salt (1/2 tsp): A pinch sounds small, but it amplifies every other flavor and prevents the cake from tasting flat.
- Unsalted butter (1 cup, softened): Leave it on the counter for 30 minutes until it yields easily to a finger press; cold butter won't cream properly, and that affects everything.
- Granulated sugar (2 cups): The creaming process with butter traps air into the batter, which is why beating for three to four minutes matters more than you'd think.
- Room-temperature eggs (4 large): Cold eggs won't emulsify smoothly into the batter; place them in warm water for five minutes if you forget.
- Vanilla extract (1 tbsp): Use real vanilla, not imitation—the difference is subtle but unmissable when nothing else competes for attention.
- Whole milk (1 1/4 cups, room temperature): Cold milk can seize the batter slightly, so let it sit out while you're prepping everything else.
- Gel food coloring: Gel is concentrated and won't thin your batter like liquid coloring does; you'll get true, jewel-toned shades that actually show the ombre gradient.
- Egg whites (6 large): For the buttercream, these need to be absolutely free of yolk—even a speck of fat prevents proper whipping.
- Granulated sugar (1 1/2 cups for buttercream): This dissolves into the egg whites over heat, stabilizing them and creating that silky texture.
- Unsalted butter (1 1/2 cups, softened and cubed): Cube it ahead so it incorporates smoothly without deflating the whipped meringue.
Tired of Takeout? 🥡
Get 10 meals you can make faster than delivery arrives. Seriously.
One email. No spam. Unsubscribe anytime.
Instructions
- Set yourself up for success:
- Preheat your oven to 350°F and grease four 8-inch round pans with butter, then line the bottoms with parchment paper—this small step saves heartbreak when you're trying to turn out delicate layers. Have all your ingredients measured and at room temperature before you start mixing.
- Build your dry foundation:
- Whisk together flour, baking powder, and salt in a medium bowl, making sure there are no lumps hiding in the flour; this distributes the leavening evenly so all four layers rise the same way.
- Cream butter and sugar until clouds form:
- Beat butter and sugar together for three to four minutes until the mixture is pale, fluffy, and noticeably lighter—this aeration is what gives the cake its tender crumb. It should look almost like soft clouds when you're done.
- Add eggs one at a time like you mean it:
- Drop each egg in and mix for about a minute before adding the next one; rushing this step means the batter doesn't emulsify properly. Once all eggs are in, mix in vanilla extract until just combined.
- Alternate wet and dry carefully:
- Starting with flour, add about a third of the flour mixture, then half the milk, then another third of flour, then the remaining milk, then the final flour portion—always mixing just until combined. Over-mixing develops gluten, which toughens the cake.
- Create your color story:
- Divide the batter evenly into four bowls and tint each with increasing amounts of gel coloring, starting with the lightest shade in the first bowl and building up to your darkest shade in the fourth. The progression should feel like a natural gradient, not jarring jumps.
- Pour with intention:
- Pour each colored batter into its prepared pan and smooth the top with an offset spatula so the layers bake evenly. Darker batters sometimes need a few extra seconds to settle.
- Bake until the toothpick test passes:
- Bake for 22 to 25 minutes—your oven might run hot or cold, so start checking at 20 minutes. When a toothpick inserted in the center comes out clean or with just a few moist crumbs, they're done.
- Cool with patience:
- Let the layers rest in their pans for 10 minutes so they firm up enough to handle, then turn them out onto wire racks to cool completely. This takes about an hour; don't skip this or your frosting will melt.
- Heat your egg whites and sugar together:
- Whisk egg whites and sugar in a heatproof bowl set over simmering water, stirring constantly until the sugar dissolves and the mixture reaches 160°F—use a thermometer, don't guess. This pasteurizes the eggs and dissolves the sugar completely.
- Whip until stiff peaks stand tall:
- Transfer the warm mixture to a stand mixer and whip on high speed for about 10 minutes until stiff peaks form and the bottom of the bowl is cool to the touch. The mixture should look like glossy meringue.
- Add butter with the patience of someone who knows it matters:
- Add softened butter a few cubes at a time, mixing well between additions—the buttercream might look broken or curdled briefly, but keep going and it will come together into something silky. If it still looks grainy after all the butter is in, let it rest for a few minutes and mix again.
- Finish with vanilla and optional tinting:
- Stir in vanilla extract and divide the buttercream if you want to tint portions for ombre or accent piping. Keep it at room temperature while you stack the cake.
- Stack from dark to light:
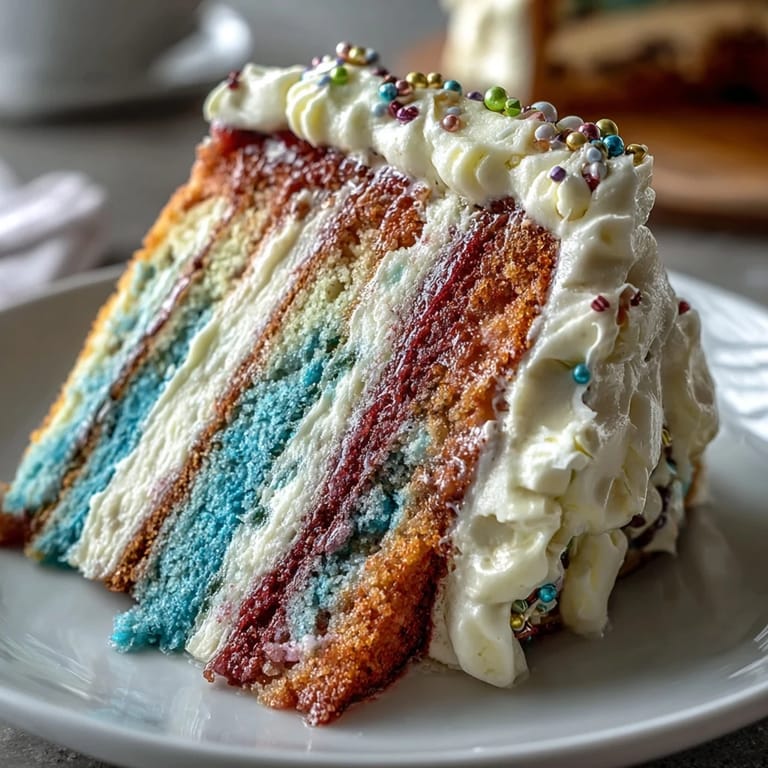
- Place your darkest layer on a cake stand or plate and spread buttercream evenly across the top, then place the next darker layer on top. Repeat until the lightest layer sits on top, creating that beautiful gradient when viewed from the side.
- Apply a thin crumb coat:
- Spread a thin, almost transparent layer of buttercream over the entire cake to seal in crumbs, then chill for 20 minutes. This step prevents crumbs from dragging through your final frosting.
- Frost with intention and blend for effect:
- Apply a thicker final layer of buttercream, and if you're creating an ombre effect on the outside, gently blend the tinted buttercreams together where they meet. Use an offset spatula or bench scraper to smooth or create texture, depending on your vision.
- Decorate and rest:
- Add pearls, a graduation cake topper, or piped details now while the frosting is still workable, then chill the finished cake until set. Bring it to room temperature for 20 minutes before serving so the buttercream softens just slightly.
 Pin It
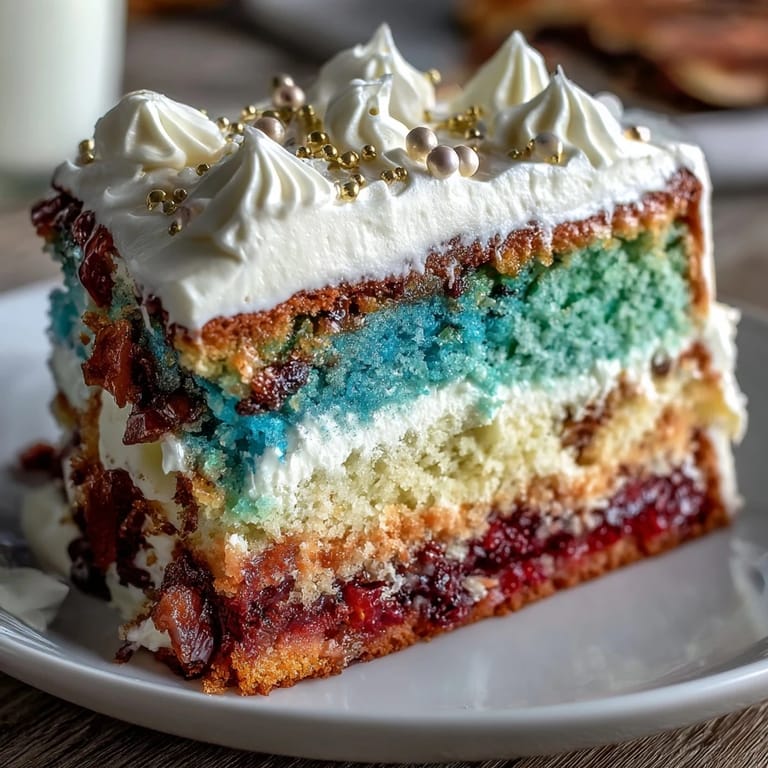
 There's a moment during any celebration cake that defines why you bothered in the first place—it's usually when someone's eyes light up, or when everyone at the table pauses to admire it before cutting in. For this ombre cake, that moment came when my cousin's friends started asking if it was from a professional bakery, and I watched her chest puff with pride as she said her cousin made it. That's when I understood this wasn't about perfection; it was about showing up with something beautiful for someone who mattered.
Choosing Your Colors Wisely
The first time I made an ombre cake, I used four colors that looked nice in theory but clashed when baked—the colors muddied and blended into something I didn't intend. Now I pick two base colors and use white to lighten one and deeper tones to darken the other, creating a natural gradient that photographs beautifully. If you're using school colors or a theme, test your gel coloring on a small piece of white fondant or frosting first so you know exactly how it'll look when baked.
The Buttercream Magic That Holds Everything Together
Swiss meringue buttercream intimidates people, but honestly, it's more forgiving than American buttercream once you understand the steps. The heat pasteurizes the eggs, so you don't have to worry about raw eggs, and the whipping creates a structure that's both sturdy enough to stack layers and silky enough to pipe beautifully. The only real risk is adding cold butter to warm meringue, which causes the mixture to break—so let the meringue cool completely, and add butter slowly, and you're golden. I've salvaged broken buttercream by letting it rest for five minutes and mixing again, and it came back together every time.
Storage, Serving, and Last-Minute Saves
This cake actually improves after a day in the refrigerator—the layers set firmer, which makes slicing cleaner, and the buttercream flavors meld beautifully. You can bake the layers a day ahead, wrap them individually, and assemble the cake the morning of the celebration. If you're transporting it, keep it in a cake box in a cool car and assemble any final piping or decorations after you arrive at your destination.
- If your buttercream is too soft to pipe, chill it for 15 minutes, but if it's too stiff, let it sit at room temperature for a few minutes until it softens slightly.
- The cake keeps refrigerated for up to four days, and you can even freeze the unfrosted layers for up to two months if you need to prepare ahead.
- A warm serrated knife dipped in hot water between cuts creates clean slices without dragging through the frosting—run it under hot water and wipe dry before each cut.
 Pin It
 Baking this cake taught me that celebration desserts aren't just about taste—they're about marking a moment and showing someone they matter enough for you to try. Every layer, every brushstroke of frosting, every choice of color carries weight. This ombre cake does exactly that, and it tastes as good as it looks.
Recipe FAQs
- → How is the ombre effect achieved in this cake?
The batter is divided into four portions, each tinted with increasing amounts of gel food coloring to create a smooth gradient across the layers.
- → What type of buttercream is used for frosting?
A Swiss meringue buttercream is prepared by gently heating egg whites and sugar, then whipping and adding softened butter for a silky texture.
- → Can the cake be decorated for different themes?
Yes, edible pearls and themed toppers like caps or diplomas can be added to customize the cake for any celebration.
- → What tools are recommended for assembly?
Use multiple 8-inch round pans, a stand mixer, offset spatula, piping bags, and wire racks for optimal results.
- → How should the cake be stored after decorating?
Chill the cake to set the frosting, then bring it to room temperature before serving to enhance flavor and texture.
- → Is gel food coloring necessary for vibrant colors?
Gel coloring is preferred as it provides more intense, vibrant hues without thinning the batter.