 Pin It
 My neighbor showed up at my door one autumn afternoon with a plate of these glossy red apple bites, and I immediately understood why she'd been sneaking them all week. There's something about that first crack when your teeth break through the candy shell, hitting the tartness of the apple underneath, that just works. She taught me that day that candy-making doesn't need to be intimidating, and honestly, once you nail the temperature, you'll be making these for every gathering that comes around.
I made these last minute for a book club gathering, nervous that they'd be too sticky or too hard, but they turned out perfectly and became the first thing to disappear. One of my friends asked if I'd buy them from her if she made them to sell, which made me laugh but also made me realize how special something this simple could be.
Ingredients
- 2 large crisp apples (Granny Smith or Fuji): Choose apples that are firm and tart so they cut cleanly and won't get mushy when dipped in hot candy.
- 1 cup granulated sugar: This is the backbone of your candy coating, so don't skip quality here.
- 1/3 cup light corn syrup: This prevents crystallization and gives you that glossy, professional-looking finish.
- 1/4 cup water: Just enough liquid to help everything dissolve and combine smoothly.
- 1/4 teaspoon red food coloring: Add this after reaching temperature so the heat doesn't cook out the color too much.
- Nonstick cooking spray: This keeps your finished bites from sticking to the parchment.
- Optional toppings (nuts, chocolate chips, sprinkles): These go on while the coating is still warm and tacky, so timing matters.
Tired of Takeout? 🥡
Get 10 meals you can make faster than delivery arrives. Seriously.
One email. No spam. Unsubscribe anytime.
Instructions
- Prep your workspace:
- Line a tray with parchment paper and give it a light spray of nonstick spray so nothing sticks when you're done. This is your landing pad for the warm candy apples, so set it up before you start cooking.
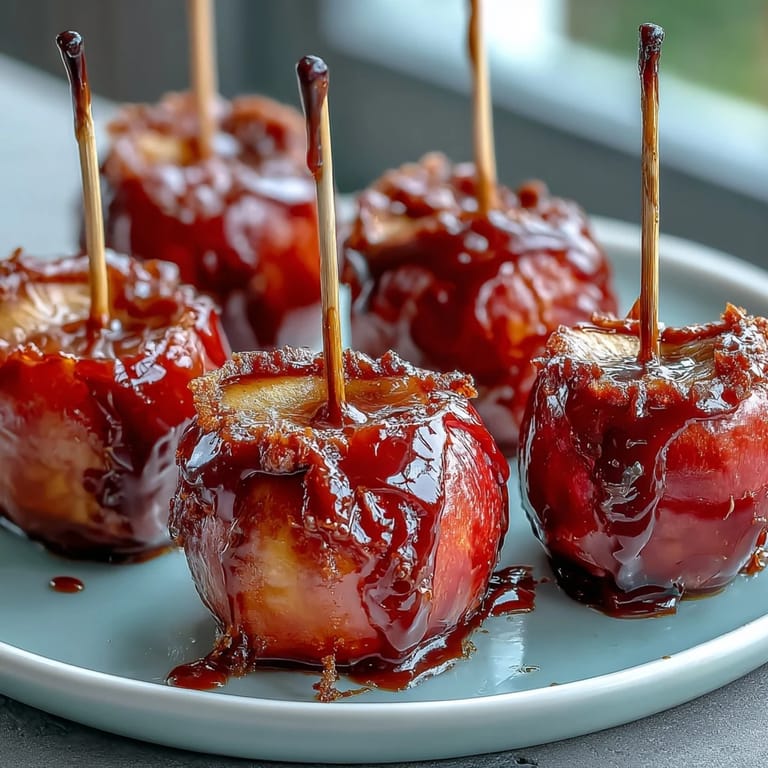
- Cut and dry the apples:
- Core your apples and cut them into roughly 1-inch chunks, then pat them completely dry with paper towels. Any moisture on the apple will cause the candy to slide right off, so take your time here.
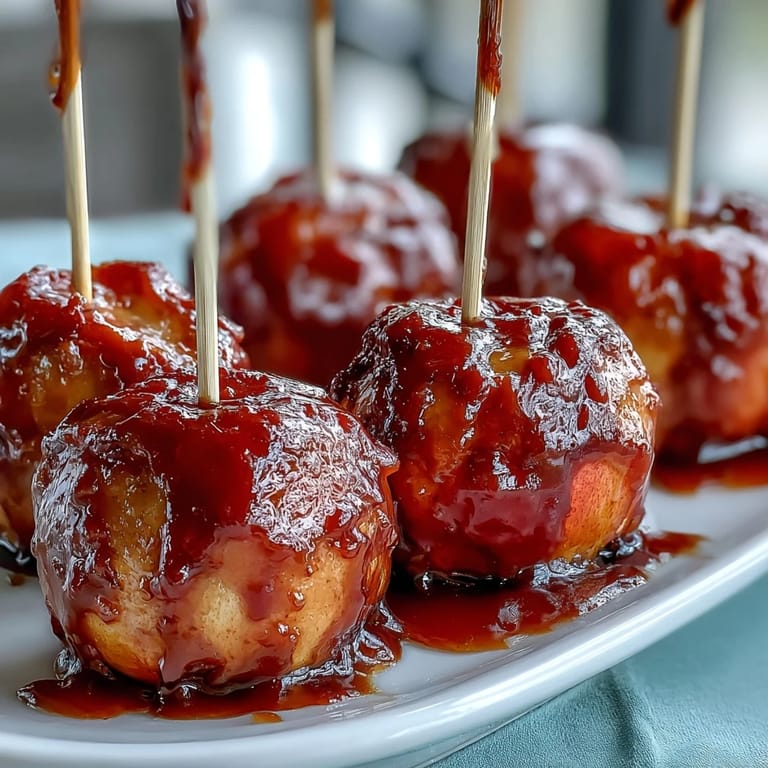
- Skewer the apple pieces:
- Push a toothpick into each apple chunk and set them on a clean surface within arm's reach of your stove. You'll want everything ready because once that candy hits 300°F, you're working fast.
- Combine and heat the candy base:
- Pour sugar, corn syrup, and water into a small saucepan and stir until everything is wet. Turn the heat to medium-high and let it come to a boil without stirring after that point, which prevents graininess.
- Reach the hard crack stage:
- Keep a candy thermometer clipped to the side of the pan and watch for the moment it hits 300°F, about 7 to 8 minutes of boiling. The mixture will change from cloudy to crystal clear and smell almost toasty, which is how you know it's ready.
- Add color and cool slightly:
- Pull the pan off heat and quickly stir in the red food coloring, watching it swirl through the hot candy. Let it sit for about 30 seconds so the heat dies down just a touch, which makes dipping safer.
- Dip with confidence:
- Working quickly, grab an apple skewer and dip it into the candy, twirling it so the coating wraps around completely. Let excess drip back into the pan for a few seconds, then place it on your prepared tray.
- Decorate immediately if desired:
- If you're adding nuts, chocolate chips, or sprinkles, sprinkle them on right after placing each bite on the tray while the candy is still warm and sticky. Once the candy cools, it hardens completely and toppings won't stick.
- Cool and set:
- Leave them at room temperature for at least 10 to 15 minutes until they're completely hard and glossy. Don't put them in the fridge yet, as that can dull the beautiful shine.
 Pin It
 I served these to my daughter's school function, and a parent actually pulled me aside asking if they were homemade because they looked so professional. That moment made me realize that sometimes the simplest projects done well feel like magic to people who've never tried them.
Why Temperature Really Matters
The hard crack stage at 300°F is non-negotiable because that's where the candy transforms from sticky syrup into something that actually stays crispy on the apple. I learned this the hard way my first time when I pulled it off at 295°F and ended up with chewy candy bites that stuck to your teeth. Now I know that those extra 5 degrees make the whole difference between a disappointment and something you'll make again immediately.
Choosing Your Apple Variety
Granny Smith apples are my default because they're tart enough to balance the sweetness of the candy coating, but Fuji apples work beautifully too if you prefer something slightly sweeter. The key is picking apples that are firm enough to cut into chunks without falling apart when you handle them with a toothpick. Softer apples like Red Delicious will turn mushy faster, and nobody wants mushy under all that effort.
Storage and Make-Ahead Tips
These keep beautifully in an airtight container at room temperature for up to three days, which means you can make them the day before a party without stress. The candy coating protects the apple inside, so they won't dry out or turn brown the way a plain apple slice would. Just stack them carefully with parchment between layers so they don't stick together.
- Make these the day before a party to free yourself up for other last-minute tasks.
- If the coating starts to look dull after sitting, a quick dip in clear candy coating or a light brush of corn syrup will bring back the shine.
- Store them away from humidity because moisture is the enemy of glossy candy.
 Pin It
 These little bites have a way of making people feel like you went to real effort, even though you didn't. That's the magic of simple things done well.